
How to Juice Grapes
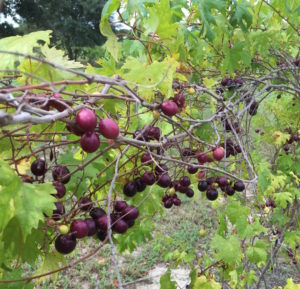
Muscadines ready to be picked
Hello everyone. Today I’m going to cover how to juice grapes, any type that you want to make jelly out of or want to make a juice concentrate from.
In this article I used Muscadine grapes as they are coming into season here in Central Florida.
I use my Kitchen Aid mixer with a food mill attachment but you can use a hand mill or the old fashion way like my grandmother used.
I’m all about quick and easy as I work full time, have five greyhounds, gardens, trees and yard that need my constant attention. Therefore I use modern conveniences available to me to help cut down on the amount of time I spend canning and putting up foods for our family.
I’m not going to cover how to make jelly in this article I’m focusing on juicing the grapes only. I will write up how to make jelly in another blog.
First you are going to need several pounds of grapes to juice. I never weigh my grapes I just eyeball the amount I have and say yep I have enough to make juice or yep I have enough to make jelly.
Once you have your grapes you need to wash them to ensure there is no dirt, bird poop or other things you don’t want in your juice.
Living here in Florida and all the sand I do a three-step wash on all my garden bounties. You might not have to do a three-step wash but I do no matter what because it seems that sand is on everything here.
Wash steps
1. Fill your sink with warm water and add about ¼ cup of baking soda to the warm water. Mix well. Then add your grapes into the bath in small batches. Swish your grapes around several times and then lift them out with your hands letting the water and other dirt drain out.
2. Fill the other side of your sink with cold water. As you drain your grapes from the baking soda wash place them into the cold water bath. Once you have one of your small batches of grapes washed and placed into the cold water bath start lifting them out like you did in the first step and place them into a large colander that is sitting on a plate to catch the water that will drain out.
3. Once you have all of your grapes processed through the first two baths and placed in your colander, rinse on of your sink bowls and refill with cold water. Now dump the entire colander full of grapes into this bath. Place your colander in the empty sink bowl and place your grapes, as you lift them out, into the colander.
I know it’s a lot of work but you will be happy you took the time to wash your grapes well. If you don’t get them washed well you might need up with sand or other things you don’t want in your jelly or juice. Nothing like eating grit or having grit in your juice… Been there don that and it’s no fun… So don’t cut corners on washing your grapes.
Now you are ready to start getting ready to juice your grapes.
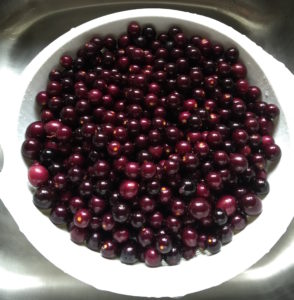
Washed Muscadine grapes ready for juicing
Juicing Steps
Take a large pot and put as many grapes that will fit into it leaving about two inches of space from the top of the pot. Fill the pot with water until it’s just over an inch over the grapes.
You might need to use more than one pot or run a couple of batches if you don’t have more than one pot.
Now place the pot on the stove and turn it on high heat. You want the grapes to come almost to a boil but don’t bring them to a full boil.
This step will allow the grapes to process through the food mill much easier than if you just process them raw.
Once you have the grapes almost to a boil pour them into your colander and let them drain a bit.
Now place your colander on the plate you used earlier to catch any water that might drain off while you are processing your grapes.
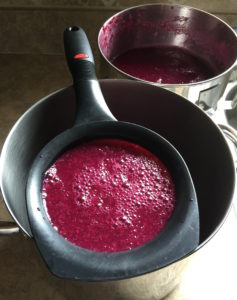
Here is my set up for processing the grape to get the juice
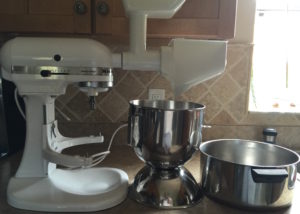
My juicing set up
Now you ask why the big pot sitting out by the edge. Well that’s where the seeds and skin will be deposited as the grapes are juiced. The bowl next to the pan is where the juice will flow into as they are processed.
Set your mixer speed to 1 or 2. DO NOT set it higher or you will have a mess on your hands and will not get as much juice out of your grapes. Here a slower speed is best
Now feed the grapes into the top of the food mill in small batches. You might have to use the pusher to help them move through the screw and into the food mill.
Continue feeding grapes into the food mill until you have processed all of your grapes.
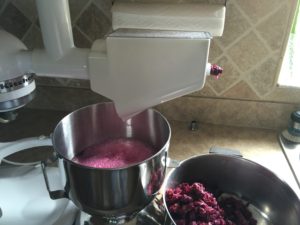
Juicing midway using Kitchen Aid mixer with food mill
Once you have your grapes processed you will have a nice large quantity of juice. The juice is not ready yet but you are a step closer.

End of juicing
Now is when I pull everything apart and clean the mixer/food mill set up. This will allow my juice rest for a few minutes. You don’t want to leave your food mill sit while you go through the next steps…. It will be much harder to clean if it sits for any length of time.
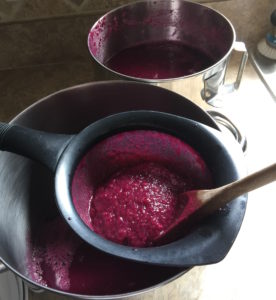
Now you will need a fine mesh strainer and a large vessel to catch your juice.

Mine mesh strainer used for juicing
Try not to jostle your juice around very much as a lot of the pulp has now settled to the bottom of the bowl.
Slowly pour the juice from your bowl into the fine mesh strainer. The strainer will start to fill and not flow well as pulp starts to settle into the strainer. Not to worry….
Juicing using fine mesh strainer
Take a wooden spoon and mix the juice in the strainer around to help the juice flow out into the vessel below. You can even press against the strainer gently to move the pulp away from the sides. Continue to do this until most of the juice has dripped out.
Juicing with fine mesh strainer and wooden spoon.
Save the pulp you can use it later.
Continue to strain your juice until it’s all been run through the fine mesh strainer. You have now removed all of the large pulp pieces.
Now that you have processed your juice through the fine mesh strainer you are ready for the next step.
Take your colander and put four layers of cheesecloth over it and down into the bottom of it. You will need to attach the cheesecloth to the colander so it doesn’t fall onto it’s self.
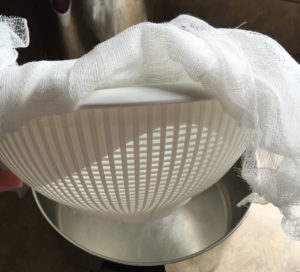
Colander with cheesecloth ready to have Muscadine juice poured through
Now place your colander over a large vessel to catch the juice as it flows through the cheesecloth. I recommend a deep pot that will hold your colander.
If you don’t have a deep pot you will need to process your juice in batches, as you don’t want to juice to reach the bottom of your colander.
Pour your juice into the cheesecloth slowly until you have what will fit into your vessel below your colander.
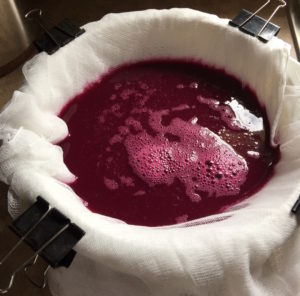
Colander with cheesecloth and Muscadine grape juice dripping through
Now walk away while you let the juice flow…. This could take a couple of hours
Once there is no more juice dripping out of your colander you are done. You now have a juice concentrate that you can drink or you are now ready to make jelly.
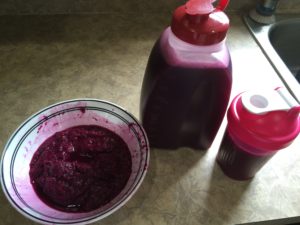
Final products, Muscadine juice and Muscadine pulp
Now don’t toss away the pulp here either…. Put the pulp with the pulp you have already saved.
If you are going to make jelly follow the instruction in the Sure Jell box, I will do a blog shortly with the step-by-step process.
Now here comes the part that fits right into one of my favorite sayings from my grandmother….
“Remember one thing son…. The cook of the house can throw more food out the back door with a teaspoon than the non-cook and throw in the front door with a shovel”
What does that mean????
A good cook will not throw anything away and will feed the family using everything!
See my blog on how to make fruit leathers on how to use the pulp you saved.